Read What is Gulp? How to Use Gulp?, to understand Gulp tool. In short, Gulp is a client side task runner tool to automate the repetitive time consuming task in web development.
Microsoft included Gulp support into Visual Studio IDE (from VS 2013) for Asp.Net projects. In this quick start article, let’s understand how to use this tool to automate some of the most repetitive tasks using Gulp in Visual Studio 2017. As mentioned in the previous article, we need to install Gulp tool locally into our project using npm package manager to start using it.
Note – Though we can use the globally installed tool, it is always recommended to use the local installation. This setup will be really helpfull when we try to setup a new development machine by getting latest version from source control where all the project dependencies are automatically restored by npm package manager based on package.json file. A dependency on global installation requires a manual installation on the system.
Let’s first include package.json file to hold the npm packages. To do this, right click project > Add New Item.. Select Web node and select npm Configuration file and click Add.
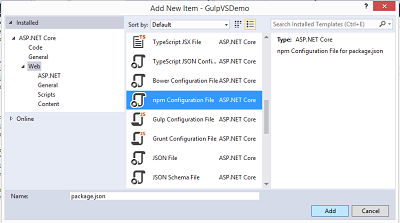
This will add package.json file in the solution. Now, we will install gulp from the command prompt. Go to command prompt (RUN > cmd) and type the below command and press enter,
npm install gulp --save-dev
Next, we will create gulp tasks to minimize html and javascript files in our solution. To do this, we need to install gulp-htmlclean and gulp-uglify plugins from command prompt using the below commands.
npm install gulp-htmlclean --save-dev
npm install gulp-uglify --save-dev
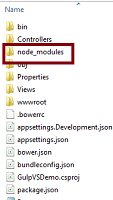
Executing above commands will install the required plugins locally into the folder called node_modules under the project root. You can see this folder in the explorer like below.
The final package.json file content is,
{
"version": "1.0.0",
"name": "asp.net",
"private": true,
"devDependencies": {
"gulp": "^3.9.1",
"gulp-htmlclean": "^2.7.14",
"gulp-uglify": "^2.1.2"
}
}
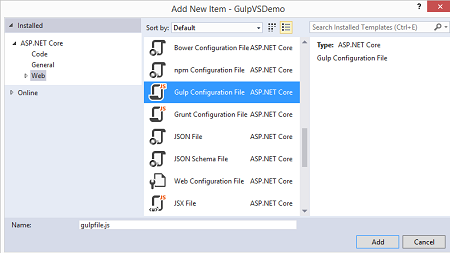
Next, let’s add gulpfile.js into our solution. To do this, right click project in solution explorer and click “Add New Item..” In the new items dialogue, under the Web node, find Gulp Configuration file and click Add.
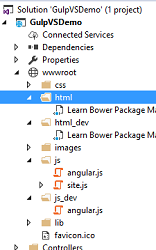
Before creating gulp tasks, let’s assume we will have our development version of html files and javascript files in html_dev and js_dev folder under wwwroot respectively. Let’s create gulp tasks to remove whitespaces in html file and minimize the javascript files using the gulp plugins. Finally, let’s also add a task to copy the resultant minimized files into the output folders named html and js under wwwroot. We will also add a default task to call all the tasks at a single shot. The final gulpfile.js content below.
var gulp = require('gulp'), htmlclean = require('gulp-htmlclean'), uglify = require('gulp-uglify');
// folders
var folders = {
root:"./wwwroot/"
};
gulp.task('html', function () {
var out = folders.root + 'html/';
return gulp.src(folders.root + 'html_dev/**/*')
.pipe(htmlclean())
.pipe(gulp.dest(out));
});
gulp.task('js', ['html'], function () {
return gulp.src(folders.root + 'js_dev/**/*')
.pipe(uglify())
.pipe(gulp.dest(folders.root + 'js/'));
});
gulp.task('default', ['js']);
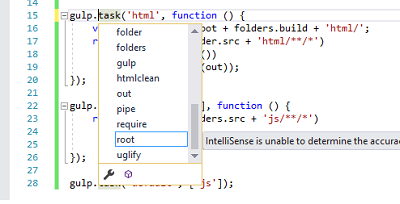
Visual Studio further helps us with the intelelisense support to create gulp tasks. Refer below.
Calling Gulp Task during Visual Studio Build
Visual Studio provides a GUI based Task Runner Explorer to link the gulp task to execute during various stages of Visual Studio build process. To get this explorer, right click gulpfile.js and click Task Runner Explorer like below.
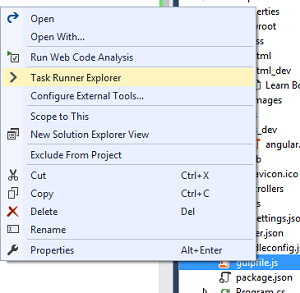
This will bring the Task Runner Explorer window at the bottom with output window tabs. Refer the below picture.
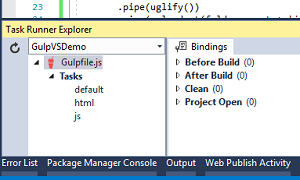
The left column will display all the gulp tasks we have scripted in gulpfile.js.
Note - If you don’t see any tasks, try clicking refresh icon seen at top left corner in the Task Runner window. If you still unable to see, then you may have not installed gulp and related gulp plugins locally using npm package manager. You can click “Restore Packages” to restore npm package by right clicking package.json file.
You can now right click a task> Bindings> and select a stage to include a gulp task to execute during that stage. I have added the default task to execute during “After Build” stage.
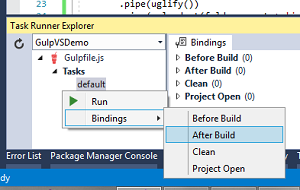
When we re-build our project you can see the gulp tasks executing after build is complete. You can see the output like below in Task Runner explorer window. It may take some time to execute the tasks so wait until all your task are completed.
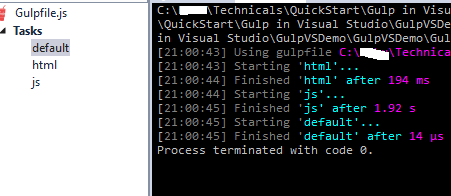
Once complete, gulp would have minimized the script files and removed the whitespaces in html file and placed the output files in the destination folder as seen below.
Happy Coding!!
